http://www.lifepixel.com/digital-infrared/digital-infrared-photography-instructions.html
http://www.tutorial9.net/tutorials/photography-tutorials/infrared-photography/
http://tutorials20.com/misc/infrared-photography/
http://photoshop-pisan.blogspot.com/2010/04/efek-ir.html
Rabu, 19 Januari 2011
Selasa, 04 Januari 2011
Cyan tone in photoshop
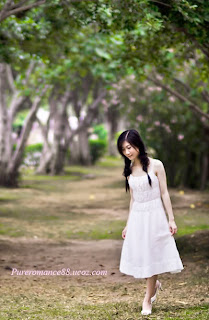
Cyan is a very nice tone and it gives romantic look for your picture background . In this tutorial i will tell you some basic techniques to get that tone .
We will use this stock:
1. Use RGB Channel:
1a. Duplicate your base. Choose Channel, choose Green, Ctrl+A. Then Ctrl+C to copy it. Choose Blue, then Ctrl+V to paste into. Choose RGB and then come back to layer pallet. We can see the change of color from yellow into light cyan. We need to strengthen the tone.
1b. New selective color. We will see the result of these two ways, and depending on your pic tone you can adjust parameters. I just adjust difference of Cyan channel and let see the different results:
- Red:-45,-18,0,0
Cyan: 100,-36,-100,0
White:-30,-39,-23,0
Neutral:12,0,-26,0.
Black:100,100,100,0.
- Red:-45,-18,0,0
Cyan: 100,100,-64,0
White:-30,-39,-23,0
Neutral:12,0,-26,0.
Black:100,100,100,0.
2. Use Channel mixer:
2a. After duplicating your base, create new channel mixer layer:
Red:139,8,-22,-10
Green:6,105,15,0
Blue:0,146,0,-6
2b. New selective color to strengthen the tone:
Cyan:100,100,0,0
Blue:100,0,0,0
Black:100,100,100,0
Or: Color balance ( to compare the effect)
Midtones:-33,0,10
Shadows:2,-4,12
3. Use Lab color:
3a. Choose Mode-Lab color. Then duplicate your base. Choose channels, choose a channel then Ctrl+A and Ctrl+C. Then choose b channel and Ctrl+V. Choose Lab channel and then choose layer pallet. We have result:
Remember we cant save jpg format in lab color so we have to change color mode to RGB to save as jpg .
We need to brighten up the light on model.
Use lasso tool to create a selection around her.
Ctrl+L to adjust levels:
And here is result:
Added by: Admin | Tags: Photo retouch, Photoshop Effect
by : http://www.tutorealized.com
Make green into warm color of autumn in easy way
Make green into warm color of autumn in easy way Today i want to show you a way to make photo from familiar green into warm color of autumn in a very easy ans simple way.
Stock:
1. Duplicate your base and set it to Screen( 50%) ( it depends on brightness of your pic, set opacity when you feel ok), Sharpen it if it needs.
2. Layer-New fill layer, choose Solid color ff631d, set it to Hue 100%
3. Ctrl+Shift+Alt+E to add all layer into a new layer ( layer 1). Then choose Chanels, choose Blue, invert by Ctrl+I. Then come back to Layer 1, set it to Soft light 40%. We will have:
4.Ctrl+Shift+Alt+I to add all layers into a new layer (layer 2). Set it to Soft light 50%
5. Now we will make our pic look nicer . Layer - New adjustment layer - Color balance:
Midtones: -10,-9,-1
Shadow:-1,6,6
6. Layer - New fill layer, choose f1f0ff, Color Burn 100%.
It's done! And i want to tell you that you can adjust parameter in every step depending on your pic to get the best result.
by : http/www.tutorealized.com
Langganan:
Komentar (Atom)


